
PRO PAINTING BLOG
Recent Updates
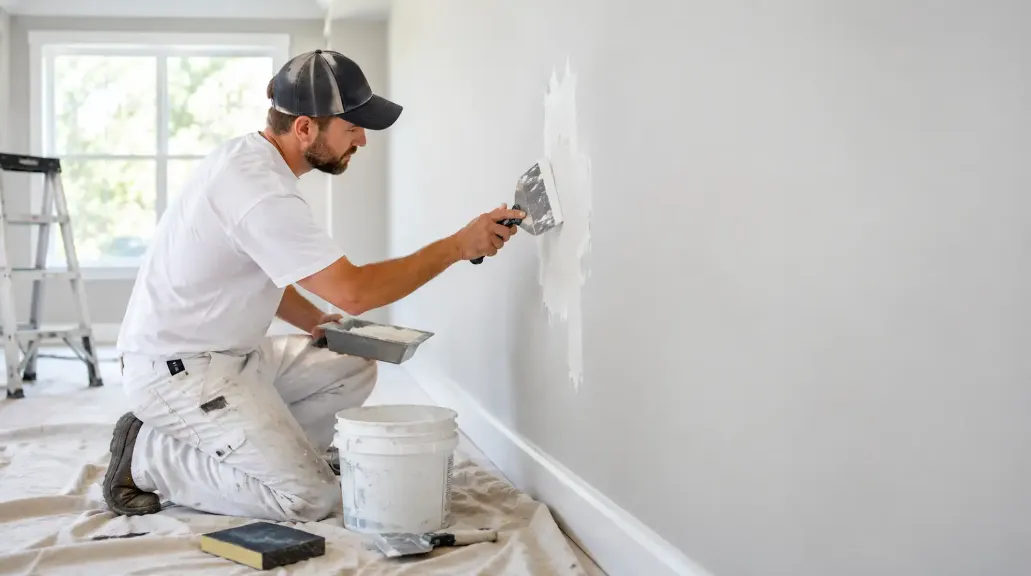
Drywall Repair Before Painting in Sioux City: What to Know
A fresh coat of paint can transform a room. But if your walls have cracks, dents, nail pops, or water stains, paint alone won’t fix them. In fact, a new finish often makes flaws easier to see, especially under bright windows or lamps that cast light across the wall.
For Sioux City homeowners, wall damage is common. Seasonal humidity swings, house settling, and everyday life all take a toll on drywall. This guide explains how to tell when your walls need repair before painting, what the repair process looks like, and when it’s worth calling a professional. If you’d like someone to take a look, you can request a free estimate from Sioux City Pro Painting.
Why Paint Won’t Hide Drywall Damage
Many people hope a thick coat of paint will cover imperfections. It rarely does. Paint is a thin film, and it follows the surface underneath it. A crack stays a crack. A bump stays a bump. And glossier finishes, which are popular for kitchens, baths, and trim, highlight flaws even more.
Skipping repairs can also shorten the life of your paint job. Cracks can reopen, loose tape can bubble, and stains can bleed through the new color. That’s why preparation is the foundation of every project we do, from patching and sanding to priming, as described on our interior painting page.
Signs Your Walls Need More Than a Fresh Coat
Before you buy paint, walk through each room in good light and look closely. Here are the most common warning signs:
Hairline cracks: Thin cracks often appear at corners, above doors, and around windows as a house settles.
Nail pops: Small round bumps where a drywall fastener has worked loose and pushed through the surface.
Holes and dents: From doorknobs, furniture, wall anchors, or removed shelves and TVs.
Peeling or bubbling tape at seams: A sign the joint compound or paper tape has failed.
Water stains: Yellow or brown rings, often on ceilings or near plumbing, windows, and exterior walls.
Soft, sagging, or crumbling spots: Often caused by moisture and usually need more than a patch.
Rough or mismatched texture: Old repairs that don’t blend with the rest of the wall.
Musty smells or dark spots: Possible mold or ongoing moisture. See the section on water damage below.
A simple trick: hold a flashlight flat against the wall and shine it across the surface. This “raking light” exposes dents, ridges, and uneven seams that are hard to see otherwise.
Common Drywall Problems and How They’re Fixed
Problem | Typical Cause | Typical Fix |
|---|---|---|
Nail pops | Drywall shrinking or framing moving | Reset or replace the fastener, then fill, sand, and prime |
Hairline cracks | Settling, seasonal movement | Remove loose material, fill or tape, sand smooth, and prime |
Small holes and dents | Impact, anchors, removed fixtures | Fill with compound or patch, sand flush, and spot prime |
Larger holes | Doors, appliances, plumbing access | Cut in a drywall patch, tape, apply compound in coats, and sand |
Loose or bubbling seam tape | Poor original taping or moisture | Cut out the failed tape, re-tape, and finish with compound |
Water stains | Leaks, condensation, roof or plumbing issues | Fix the leak, let it dry fully, seal with stain-blocking primer |
What Causes Drywall Damage in Sioux City Homes?
Understanding the cause helps you prevent repeat problems:
Seasonal humidity and temperature swings: Siouxland winters are dry and cold, while summers can be humid. Framing and drywall expand and contract with those changes, which can create cracks and pops.
House settling: Even well-built homes shift slightly over time, especially in the first years after construction and in older properties.
Moisture and leaks: Roof leaks, plumbing issues, and poor ventilation can all damage drywall from the inside out.
Everyday wear: Moving furniture, hanging décor, kids, and pets all leave marks over time.
The Drywall Repair Process, Step by Step
Whether you’re tackling a small fix yourself or hiring a pro, quality repairs follow the same basic sequence:
Inspect and identify the cause. Check for moisture, loose fasteners, or movement before patching anything.
Clean and remove loose material. Scrape away flaking paint, crumbling drywall, and failed tape so the patch has a solid base.
Fill or patch. Use spackle for small holes, joint compound for cracks and seams, and a mesh or drywall patch for larger damage.
Apply compound in thin layers. Several thin coats, feathered outward, blend better than one thick coat. Each layer needs to dry fully.
Sand smooth. Sanding makes the repair level with the surrounding wall. Dust control matters here, so protect floors and furniture.
Match the texture. If the wall is textured, the repair needs to be textured too, or it will show through the paint.
Prime the repair. Patched areas absorb paint differently than the rest of the wall, so primer is essential.
Paint. Once everything is dry and smooth, apply your finish coats.
Our own process follows this same logic: inspection, preparation, application, and cleanup. Learn more about how we approach every project.
Why Primer Matters After Drywall Repair
Fresh joint compound and spackle are porous. If you paint directly over them, the patched area soaks up paint differently and the result is a dull, blotchy patch called “flashing,” which is visible even after two coats. Primer seals the repair so the topcoat dries evenly and looks consistent across the whole wall.
Stain-blocking primer is also important for water marks, smoke, and grease stains, which can bleed through regular paint. Keep in mind that the primer only handles the stain. The source of the moisture must be fixed first.
Seeing Cracks, Stains, or Dents? Sioux City Pro Painting inspects your walls, identifies the prep and repairs needed, and gives you a clear estimate, usually within 24 hours. |
Matching Wall Texture
Texture is one of the hardest parts of drywall repair to get right. Common finishes include smooth, orange peel, knockdown, and skip trowel. Spray texture, hand-applied texture, and the final paint sheen all influence how a patch blends.
If you’re repairing a small spot, a quality spray-texture product may help you blend it in. For larger areas, or textured ceilings, professionals often have better tools and experience. Plaster walls in older homes behave differently from drywall, so check out our tips on painting older homes if that applies to you.
Water Damage and Mold: Fix the Source First
Water stains and soft drywall are more than a cosmetic issue. They’re signs that moisture got in, and painting over them without fixing the cause is a short-term fix that fails.
Find and fix the leak. This might be a roof issue, plumbing, a window, or condensation.
Let the area dry completely. Painting over damp drywall traps moisture and can lead to bubbling or mold.
Replace damaged drywall. If it’s soft, crumbling, or sagging, it should be cut out and replaced rather than patched.
Don’t ignore mold. Large areas or recurring mold may require professional assessment and remediation before any painting happens.
Once the problem is resolved and the wall is dry, the repair and a stain-blocking primer can set you up for a clean finish.
DIY or Professional? How to Decide
Small jobs you can often handle yourself
Filling nail holes and small anchor holes
Light sanding and spot priming
Minor dents and scuffs
When it’s smart to call a professional
Multiple cracks, large holes, or damaged seams
Water stains, soft spots, or any sign of mold
Textured walls or ceilings that need an invisible blend
Whole-room or whole-house projects where finish consistency matters
Older homes with plaster, lead paint concerns, or multiple paint layers
Hiring one team to handle the repair prep and the painting also helps the finish look consistent, and it avoids gaps between trades. Our painters take care of surface preparation including patching holes, repairing minor imperfections, sanding, masking, and priming. If your damage goes beyond that, such as structural or major water damage, we’ll let you know during the estimate so you can plan the right steps.
Plan Your Timing
Drywall repair takes patience. Compound needs time to dry between coats, and humid conditions slow that down. That makes a repair-and-paint project a good fit for winter months, when interior work is easy to schedule and exterior painting is limited by the weather. Planning repairs a little ahead of your painting date also gives you flexibility if anything unexpected turns up behind the wall.
Quick Checklist: Before You Paint
What to Check | What to Do |
|---|---|
Cracks | Fill or tape, sand smooth, and prime before painting. |
Nail pops | Reset or replace the fasteners, then fill and sand. |
Holes and dents | Patch to the right size, sand flush, and spot prime. |
Seams and tape | Re-tape any loose or bubbling joints. |
Water stains | Fix the source, dry completely, then seal with stain-blocking primer. |
Texture | Match the surrounding wall before painting. |
Primer | Prime all repairs so the finish coat looks even. |
Lighting | Check with a flashlight for flaws before and after repairs. |
Final Thoughts
Great paint jobs start with great walls. Taking time to repair cracks, nail pops, and damage before painting gives you a smoother finish, better coverage, and results that last. If your walls are showing their age, a repair-and-paint approach gets you far better results than a quick coat.
Ready to refresh your home? Explore our interior painting and exterior painting services, see our work for businesses on the commercial painting page, read more on the Pro Painting Blog, or contact us today.
Ready for Smooth, Flawless Walls? Get a free, no-pressure estimate from Sioux City’s trusted painters. We’ll look at your walls, explain what prep they need, and give you straightforward pricing. |
Frequently Asked Questions About Drywall Repair Before Painting
Q: Do I need to repair drywall before painting?
In most cases, yes. Cracks, holes, nail pops, and uneven seams will show through new paint, and loose or damaged areas can fail again. Even small repairs should be filled, sanded, and primed before you paint.
Q: Can I just paint over cracks in drywall?
You can, but the cracks will likely remain visible and may reopen. Hairline cracks should be cleaned, filled, sanded, and primed first. If cracks keep coming back, there may be movement or moisture that needs to be checked.
Q: Can I paint over a water stain on drywall?
Only after the leak is fixed and the drywall is completely dry. Then the stain should be sealed with a stain-blocking primer, since regular paint often lets stains bleed through. If the drywall is soft or sagging, it needs to be replaced rather than painted.
Q: Do I need primer after patching drywall?
Yes. Patched areas absorb paint differently than the surrounding wall, which causes a dull, uneven look called flashing. Priming the repair, or priming the whole wall, helps the topcoat look consistent.
Q: How long should drywall compound dry before painting?
It depends on the product, how thick the layer is, and the humidity in your home. Thin coats may be ready for sanding in hours, while thicker patches may need longer. Always follow the product’s instructions and make sure the compound is completely dry before sanding and priming.
Q: How do I match wall texture after a repair?
Matching depends on the texture type, such as orange peel, knockdown, or skip trowel. Small spots can sometimes be blended with spray-texture products, but larger areas and ceilings are typically better left to a professional for a seamless match.
Q: Does Sioux City Pro Painting handle wall prep before painting?
Yes. Our prep work includes patching holes, repairing minor imperfections, sanding, masking, and priming. Request a free estimate or call (712) 217-3200, and we’ll look at your walls and explain what’s needed.
Have More Questions? Our team is happy to talk through your walls and your project before you commit to anything. |

WELCOME
Welcome to our site! We are in the process of building our blog page and will have many interesting articles to share in the coming months. Please stay tuned to this page for information to come. And if you have any questions about our business or want to reach out to us, we would love for you to stop by our contact page.
Thank you!
©2026 Sioux City Pro Painting - All rights reserved
Created by Showcase 712