
PRO PAINTING BLOG
Recent Updates
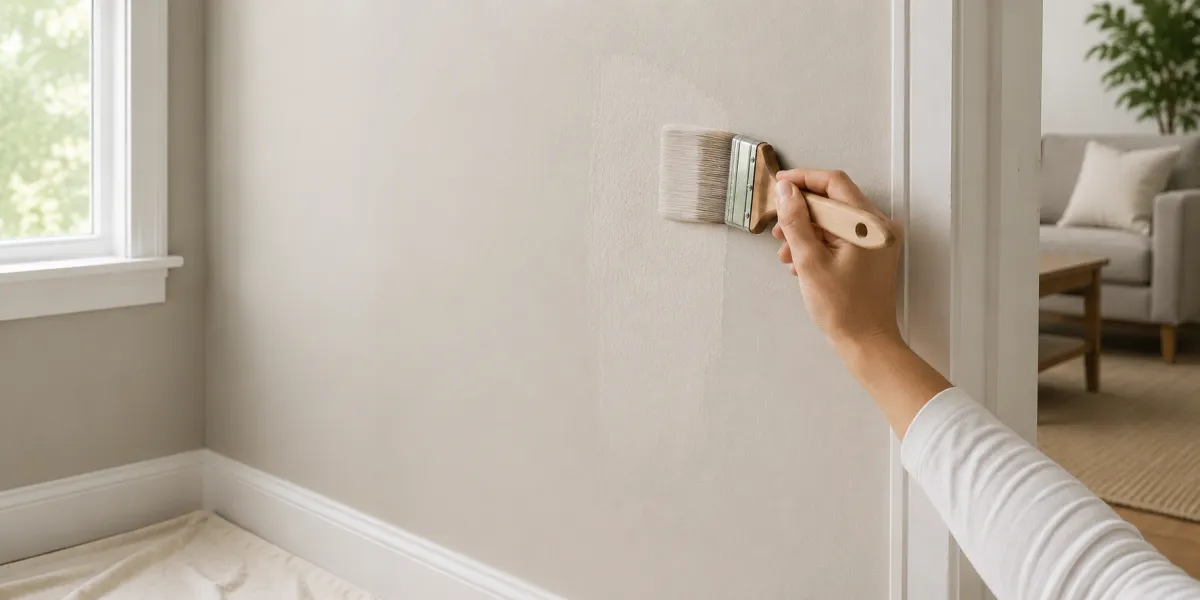
How to Touch Up Interior Paint Without It Looking Patchy | Sioux City Pro Painting
You finally notice it, a scuff near the light switch, a small chip along the baseboard, or a water mark that's been bothering you for weeks. So you grab the leftover paint, dab it on, and step back. Instead of a seamless fix, you're staring at a bright, obvious blob that looks worse than the original blemish. Sound familiar?
Patchy touch-ups are one of the most frustrating painting problems homeowners face, but they're almost always preventable. With the right interior paint touch up tips and a little patience, you can make repairs that truly disappear into the wall. In this guide, the pros at Sioux City Pro Painting walk you through everything, from color matching painted walls to applying paint so seamlessly that even you'll forget there was ever a scratch.
Why Do Touch-Ups Look Patchy in the First Place?
Before jumping into fixes, it helps to understand what causes patchiness. The culprit is almost never the paint color itself, it's almost always one of these four factors:
Sheen difference: Paint sheen fades over time. Fresh paint, even the exact same color, will reflect light differently than aged, flat paint on the wall.
Coverage: A single coat over a spot can look opaque on its own but transparent against the aged surrounding paint.
Feathering: If the edges of your touch-up are sharp and abrupt, they create a visible boundary that screams "patch."
Dried-out or tinted paint: Leftover paint that has been sitting for over a year may have shifted in color or consistency, making it impossible to match.
Understanding these issues is the first step toward seamless paint repairs. Each one has a fix.
Step 1: Identify and Prep the Right Paint
Check Your Leftover Paint First
If you saved the original can, you're ahead of the game, but don't assume it's still good. Open the can and inspect it. If there's skin on top, peel it off carefully. Stir the paint thoroughly for at least two to three minutes. If it's clumpy, separated in ways that won't blend back, or has a sour smell, it's time to get a fresh batch.
Also, note the sheen. Interior paints come in flat, matte, eggshell, satin, semi-gloss, and gloss finishes. Using the wrong sheen, even with a perfect color match, will make your touch-up stand out under any lighting. Always match sheen as precisely as you match color.
Color Matching Painted Walls: Your Options
If you don't have leftover paint, or if your original paint is no longer good, you'll need to match the color. Here are your three best options for color matching painted walls:
Paint chip method: Cut a small swatch (about 1.5" x 1.5") from an inconspicuous area of the wall, inside a closet or behind a door , and bring it to a paint store. Most major retailers can scan it with a spectrophotometer for a precise formula match.
Digital color matching apps: Apps from brands like Sherwin-Williams and Benjamin Moore let you photograph a wall section and suggest the closest match from their color library. Useful as a starting point, but still verify in-store.
Label or sticker on old can: Many contractors leave the original paint formula sticker on the can lid. If yours is intact, the store can reproduce it exactly from the formula code.
When picking up matched paint, always specify the same sheen level as your wall. If you're unsure what sheen is currently on the wall, run a damp cloth over it in strong light , matte/flat finishes will look chalky, while satin and semi-gloss will maintain a soft shine.
Not sure what finish is on your walls? Our team can help.
Get a free consultation from Sioux City Pro Painting
Step 2: Prepare the Surface Properly
This is the step most homeowners skip , and the most common reason touch-ups fail. Paint bonds best to a clean, lightly abraded surface. Skipping prep leads to poor adhesion, which shows up as an obvious patch.
Clean the Area
Wipe the damaged area with a slightly damp cloth to remove dust, grease, and fingerprints. For kitchen walls near cooking surfaces or areas near light switches, use a mild degreaser. Let the surface dry completely before painting , 20 to 30 minutes minimum.
Sand Lightly
Use 120 to 150-grit fine sandpaper to lightly scuff the area and about two to three inches beyond it. This does two things: it removes any raised edges from old dried drips or chips, and it creates a micro-texture that new paint can grip. After sanding, wipe away all dust with a tack cloth or a barely damp cloth.
Prime If Needed
If the damage goes down to bare drywall, bare wood, or if there's a stain involved (water mark, crayon, grease), prime the spot before painting. Use a small amount of stain-blocking primer and let it cure fully , usually one hour. Skipping primer on bare spots almost always results in a dull, flat-looking patch that won't match.
For a deeper dive on primer selection, see our guide:
How to Choose the Right Primer for Any Surface in Sioux City
Step 3: Apply Paint the Right Way
Now comes the technique. This is where seamless paint repairs either succeed or fall apart.
Use the Right Applicator
Match your applicator to the original paint application as closely as possible:
If the wall was rolled: Use a small foam roller (4" or 6") rather than a brush for the touch-up. Rollers leave the same orange-peel texture as the original coat. A brush will leave visible strokes.
If the wall was brushed (like woodwork or trim): Use a quality angled brush that closely matches the size of the repair area.
For very small spots: A cosmetic sponge can work surprisingly well on smooth walls , it mimics the light stipple of a roller without the mess.
Apply in Thin Coats
Don't try to cover the repair in one thick coat. Apply a thin layer, let it dry fully (30 to 60 minutes for most latex paints), and assess. Two or three thin coats will look far more natural than one heavy application.
Feather the Edges
This is the key technique for seamless paint repairs. Rather than stopping your brush or roller at the exact edge of the damaged area, gradually reduce pressure and paint coverage as you move outward from the center of the patch. The goal is for the new paint to fade imperceptibly into the surrounding wall, with no hard line.
Think of it like blending foundation , you want a gradual transition, not a defined border. On a flat wall, feathering out 3 to 6 inches from the repair area is usually enough. For textured or heavy-nap walls, you may need to feather even further.
Blend Into Corners When Possible
If the touch-up area is near a corner, doorframe, or ceiling line, paint all the way to that natural break. Natural architectural boundaries serve as visual stopping points that make touch-ups virtually invisible. If you stop in the middle of an open wall, the edges of your repair are far more likely to show.
Step 4: Deal With Sheen Differences
Even with perfect color matching, sheen mismatch can make a touch-up look patchy in certain lighting. If you're working on a wall that's several years old, the finish has softened and aged, and fresh paint will look brighter or shinier by comparison.
Tricks for Reducing Sheen Contrast
Let the touch-up cure fully (not just dry): Fresh paint continues to off-gas and change in appearance for 30 days after application. A touch-up that looks slightly off on day one may blend much better after a week.
Lightly sand with 220-grit after final coat: Once your touch-up is fully cured, a very light pass with ultra-fine sandpaper can knock down the sheen to better match the aged surrounding paint.
Repaint the entire wall section: If the touch-up still shows after curing, the most reliable fix is to repaint the entire wall from corner to corner. This is often the only way to achieve a truly invisible repair on aged walls , and it's exactly what professional painters recommend.
Touch-ups not working out? Our interior painting team covers entire rooms , flawlessly.
Explore our Interior Painting Services
When to Stop Touching Up and Just Repaint
There's no shame in recognizing when a touch-up has reached its limit. Here are the signs it's time to schedule a full interior repaint:
The wall has more than five or six visible repair patches , at this point, the cumulative inconsistency is more noticeable than a fresh coat would be.
The existing paint is more than 7 to 10 years old, significantly faded, or chalking.
You can no longer find or match the original paint color, even with scanning.
The room is going on the market , buyers notice patchy walls, and a professional repaint offers strong ROI.
The sheen is so far gone that no amount of color matching corrects the visual inconsistency.
A full interior repaint isn't just about aesthetics. Fresh paint also protects drywall from moisture, improves indoor air quality (especially with low-VOC options), and refreshes the entire feel of a room. For Sioux City homeowners weighing the decision, our
Interior Painting Sioux City page covers everything you need to know about the process and what to expect.
Pro Tips Summary: Interior Paint Touch Up Tips at a Glance
Always match both color AND sheen , sheen mismatch is the #1 cause of visible patches.
Clean and lightly sand before applying any paint , adhesion is everything.
Prime bare spots or stains before painting over them.
Use a small foam roller on rolled walls, not a brush.
Apply two to three thin coats, not one thick coat.
Feather edges 3 to 6 inches outward for a gradual, invisible transition.
Paint to a natural break (corner, doorframe, ceiling) whenever possible.
Allow full 30-day cure before judging the final result.
When in doubt, repaint the whole wall , it's always the most reliable solution.
Frequently Asked Questions
Q: Why does my touch-up look shiny compared to the rest of the wall?
A: Fresh paint reflects light differently than aged paint, even with the same sheen level. The contrast is most visible in the first few weeks. Allow the touch-up to fully cure (up to 30 days) and the difference should reduce. If it doesn't, lightly sanding the cured patch with 220-grit paper or repainting the full wall section are your best options.
Q: How long should I wait between touch-up coats?
A: For most latex interior paints, wait at least 30 to 60 minutes between coats. However, 'dry to touch' and 'ready for a second coat' are not the same thing. Applying a second coat too early traps solvents and causes visible texture irregularities. When in doubt, wait an hour.
Q: Can I touch up paint that's more than a year old?
A: Yes, but it's trickier. Open the can and check for separation or skin. Stir thoroughly for 2-3 minutes. If the paint hasn't shifted in color or gone bad in texture, it can still work. The bigger challenge is that the wall paint has likely faded, so the original formula may no longer be an exact match. For best results, bring a wall chip to a paint store for a fresh match.
Q: Should I use a brush or roller for touch-ups?
A: It depends on how the wall was originally painted. For rolled walls (most interior drywall), use a small 4" to 6" foam roller. It replicates the texture of the original coat far better than a brush. Brushes are best reserved for trim, molding, and surfaces that were brush-applied originally.
Q: What's the best way to match paint color without the original can?
A: Bring a paint chip , a small piece cut from a low-visibility area of the wall , to a paint retailer with a spectrophotometer scanner. Major brands like Sherwin-Williams and Benjamin Moore offer this service and can reproduce the formula with high accuracy. Always verify the sheen level at the same time.
Q: Is there a way to fix a patch that already looks bad?
A: Yes. Start by lightly sanding the patch with 220-grit sandpaper to level and dull the surface. Wipe clean. Apply one thin coat of the matched paint, feathering the edges out well beyond the patch area. Let cure and assess. If the patch still shows after curing, repainting the entire wall section from corner to corner is the professional-grade solution.
Need flawless interior results? Leave it to the pros.
Request a free quote from Sioux City Pro Painting , (712) 217-3200

WELCOME
Welcome to our site! We are in the process of building our blog page and will have many interesting articles to share in the coming months. Please stay tuned to this page for information to come. And if you have any questions about our business or want to reach out to us, we would love for you to stop by our contact page.
Thank you!
Home | Get a Quote | Privacy Policy | Contact
©2023 Sioux City Pro Painting - All rights reserved
Created by Showcase 712